Tuesday, May 31, 2016

Welcome to the Red Leaf River Inn


In October of 2013, we stood starry eyed under falling red leaves and saw the gorgeous potential of an abandoned estate.  In December of that year, after so many obstacles that we began to wonder if someone was trying to tell us something, we finalized the purchase of our Inn.

In January of 2014, we stood in the cold under barren trees and leaking water pipes and wondered what we had gotten ourselves into.  Still, we were determined to breathe life back into the ivy choked house.  We gave ourselves just over a year to make the changes.  

Every project we started seemed to have a never ending list of complications added to it and there were many times when it seemed easier to give up, but we knew that a property as special as this deserves to be cared for and shared.  So, we built something else, painted and sanded and stained and fixed and fixed again.

Now, two and a half years later, we are finally able to officially invite you to come and stay.  Hear the cool mountain breezes through the trees and the gentle sound of the stream.  Relax in our newly renovated rooms.  Enjoy great food and company.  

We invite you inn.  Welcome to the Red Leaf River Inn.


Wednesday, May 25, 2016

Window Art


The cleaned up frame
At the beginning of the year, we replaced thirty five windows in the Inn, that's nearly every single window except for the large picture windows in the main room and a couple in the basement.  The windows were old and in poor condition, with smaller panes of glass.  One of the windows, though, was a casement style that had been stuck closed since we moved in, and was about two feet wide and four feet tall.

We salvaged it and I immediately thought of turning it into some of sort of picture frame, probably a collage of smaller pictures since the window was so large.

After a few months of working on other projects, we dug the window back out and started cleaning it up.  First was the removal of a whole lot of dust and spiderwebs, then I sanded the frame lightly.  The outside of the frame is heavily coated in paint, but the inside is just wood and cleaned up nicely.

I restained the frame, using ebony to bring out the nicks and dings, and a lighter maple to even out the color.  Then I washed the whole thing in driftwood to give it a little bit of a smoky finish and some grey tones.  Last was a layer of wax to seal it all in.

Etching cream, stencil adhesive and rubbing
alcohol for cleaning
Then (after cleaning the glass again to get rid of all the stain smudges) I started laying out pictures to see how the collage might work.  The large expanse of glass was harder to fill than I first imagined, so I thought first about giving the glass a faux mercury finish around the edge to take up some of the space.  I was worried that would make it too opaque to see the pictures through, so then I thought about frosting the glass instead.  In the process of that, I discovered glass etching.

Using acid, glass etching cream will permanently etch glass rendering it more opaque than unetched glass.  So I picked up a bottle of the cream along with some new stencils and stencil adhesive and set to work deciding my design.

Pictures and the dry erased stencils
Tracing the stencils on the reverse side
I laid the pictures out again and then started tracing the stencils onto the negative spaces using a dry erase marker.  I also used the dry erase marker to trace around the pictures so I would remember where they went.  Next I taped off a narrow border around the edge of the frame, partially because the frame is very narrow for the size of glass and partially because some of the paint on the reverse side was still visible and I was hoping to hide it a bit.  Once I was happy with the arrangement, I removed the pictures and flipped the frame over to mark the placement of both stencils and pictures with the dry erase marker.  Then the front of the glass was erased with first plain window cleaner and then rubbing alcohol.  Some window cleaners (especially those that say they resist fingerprints) can leave a film that inhibits the etching.  Perfectly clean glass means even etching.

Then came the fun part - the etching.  I applied stencil adhesive to the backs of the stencils and then firmly adhered them to the glass.  There are special etching stencils, but I used regular painting stencils.  Just make sure they are completely adhered or the etching cream can get underneath the stencil and blur the image.  After waiting a few minutes, I removed the stencil and wiped off the cream with water.
Finished etching on the left while the cream does its work on the right.  Water will make the etching "disappear" so they will darken considerably as the glass dries.


All the etching completed.  The border required a lot of cream and more water than I had on hand.  A few streaks are visible at the top of the glass from where the cream smeared as I was cleaning it up.


The etched glass with pictures

Friday, May 20, 2016

How to Build a Bench


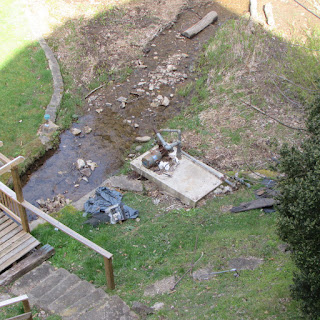
Down by the pond lived a shed housing a large mystery engine and all its accompanying wires and pipes.  The shed was a bit falling down with the doors coming off the hinges and a few shingles missing.  We weren't exactly sure what its function had been - one person told us it was a turbine engine to produce electricity.  We eventually decided it had probably been tied into the sprinkler system for the yard.  Whatever it had done in the past, it did nothing now but provide a home for an astonishing variety of spiders.

We had originally planned to put new doors on it and paint it and just leave well enough alone, which has worked out *so* well for us in the past.  Next thing I know, this happens:


The shed was torn down and most of the pipes cut away.  The main pipe and the engine itself were both too entrenched and heavy to take out, which left us with a cement slab and an engine.  A suggestion was made that we could put a bench there and maybe built some sort of table over the 
engine.  And then this happened:

I guess technically that could be considered a bench and a table.

The brand new deck overlooking the pond with a bench seat and chairs


Saturday, May 7, 2016

Come on Inn, Y'all!

Taking down the old sign
So many moons ago (23 of them to be exact), we set up an obscenely tall ladder on the gentle slope that is our road and spent some time fixing up the Chestnut Walk archway that presides over the entry to the Inn.  Although the arch is pretty solid, it is also quite tall and sways alarmingly when one is fifteen feet or so up on a ladder.

We painted the chipping sign and removed the old bed and breakfast sign that was hanging from the archway.  This was necessary both to take down the old name (which we had no ownership of) and it helped slow the flow of people coming to see the Inn.  We love visitors, but at the time parts of the house and grounds were unsafe and we had all kinds of projects in various states of completion.  In other words, it's been a bit of a mess.

But now the honey-do list has shrunk from a thousand things to a mere five hundred and we are actually getting ready for our grand opening!  So we decided to put up a new sign.

We decided on a painted wood sign for now, in the shape of our leaf logo.  What, you thought we would do a simple rectangle?  Crazy talk.

We painted the sign grey and then hand painted the leaf outline in red laquer

Next we hand lettered the Inn name with a black Sharpie paint pen  - I love these things

Hanging the sign - a little to left, honey!

The finished sign, mostly straight and almost centered