Friday, November 4, 2016

The Chestnut Suite

There's a sign so its official.
Once upon a time, two sisters visited an old, once loved, and long abandoned house.  They didn't see worn floors and acoustic tile ceilings.  They didn't see salmon pink bathtubs and leaking pipes.  No, they saw lovely, rosy potential gently showered by falling red leaves and backed by the peaceful rush of the stream.
Of course, it didn't take long to realize the immense amount of work in store, even for the rooms that were almost up to par.  The downstairs, with it's two small bedrooms and two tiny bathrooms in a shared hallway, became a project for "one day."

Now, the handy innkeeper is not the sort for "one day."  He's the sort that unpacks all the boxes the day you move and builds an entire deck when the request was for a bench.

So it should come as no surprise that the original idea of updating one of the bathrooms and closing the other off and then cleaning up the two bedrooms was sort of forgotten about.

Bedroom the first, with three kinds of
paneling and one tiny window
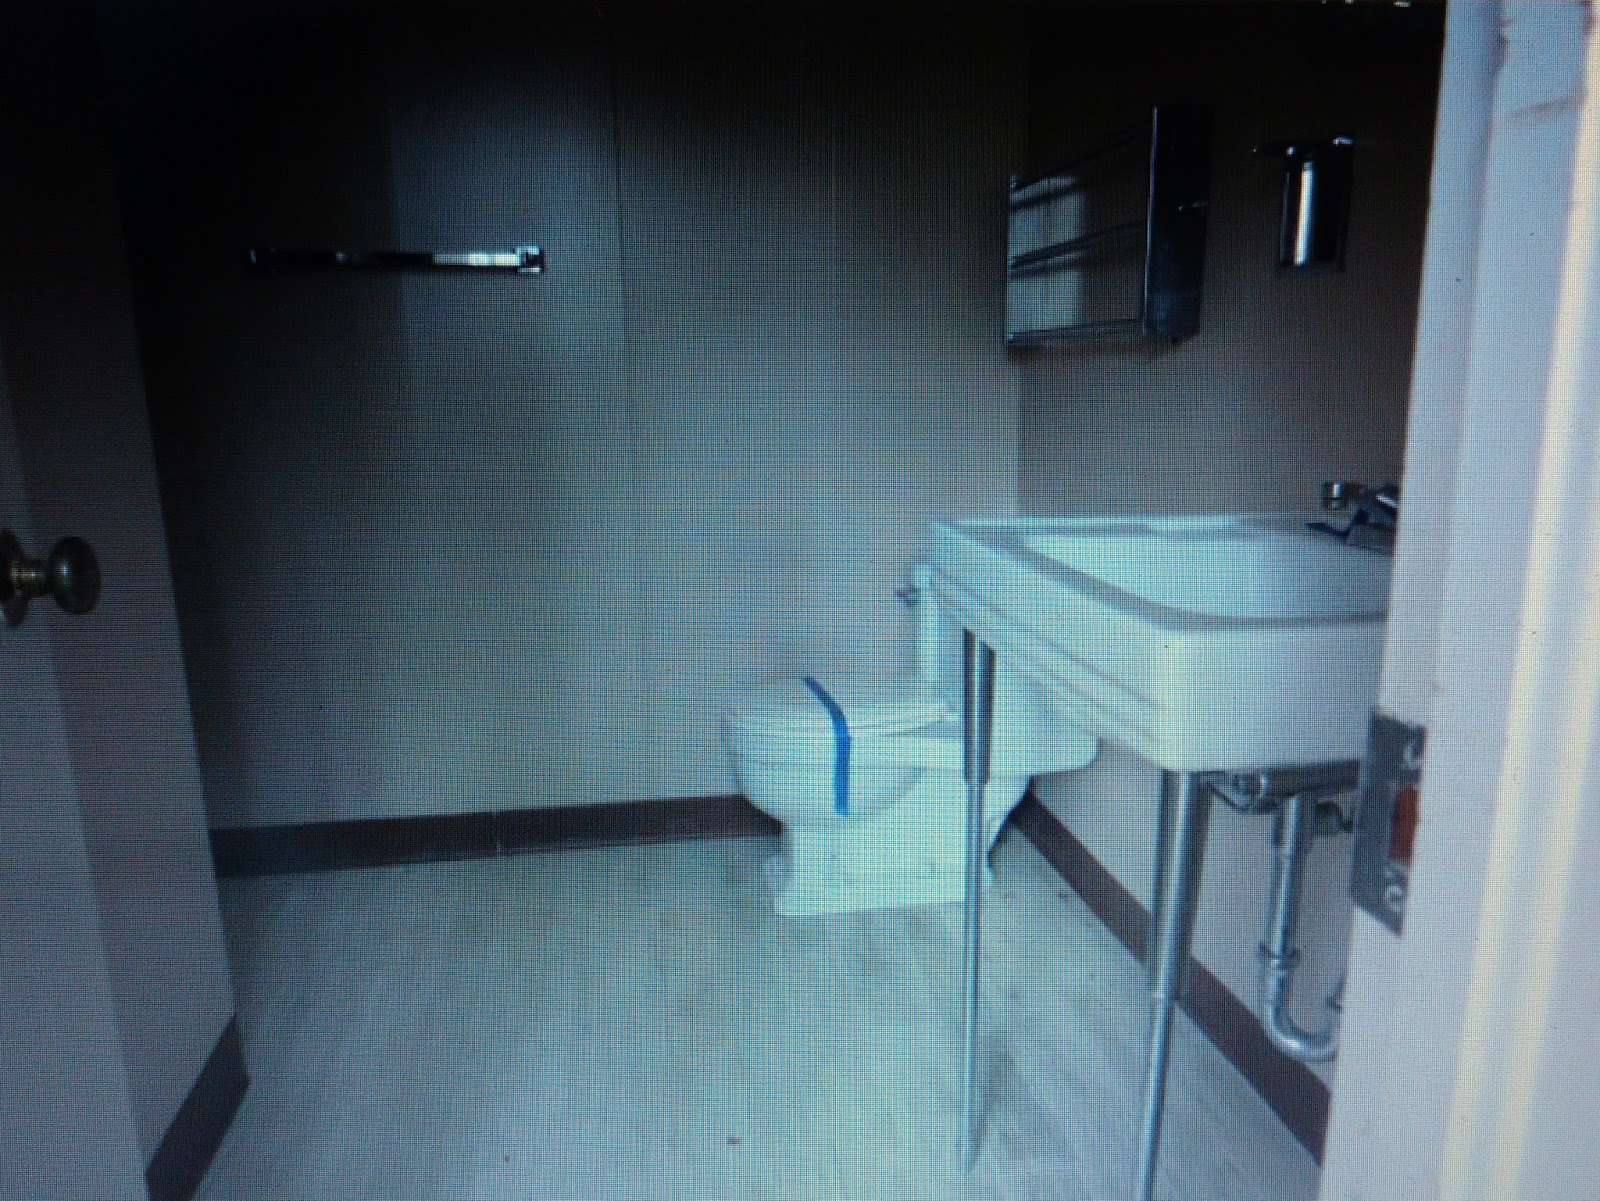
Bathroom the first, complete with dark
alcove to stare into while contemplating
your life on the toilet.

Bathroom the second - no dark alcove,
just lots of, er, efficiency in the space
Bedroom the second, with tons of windows
to showcase the water damaged and molded walls.


Now, technically, none of these rooms counted as bedrooms because neither of them had a closet.  There was some pretty bad water damage as well as a mystery leak that we hoped came from a pipe in the wall, the alternative being a leaking foundation which would have been pretty insurmountable.
We had been using the rooms as storage, particularly for the handy innkeeper's assorted wood working tools, each of which he declares vital.  So the first step was shoving - I mean - carefully organizing said tools into a new room.  

Second step was, of course, demolition.


Demolition of the first shower,
by hand with a sledge hammer


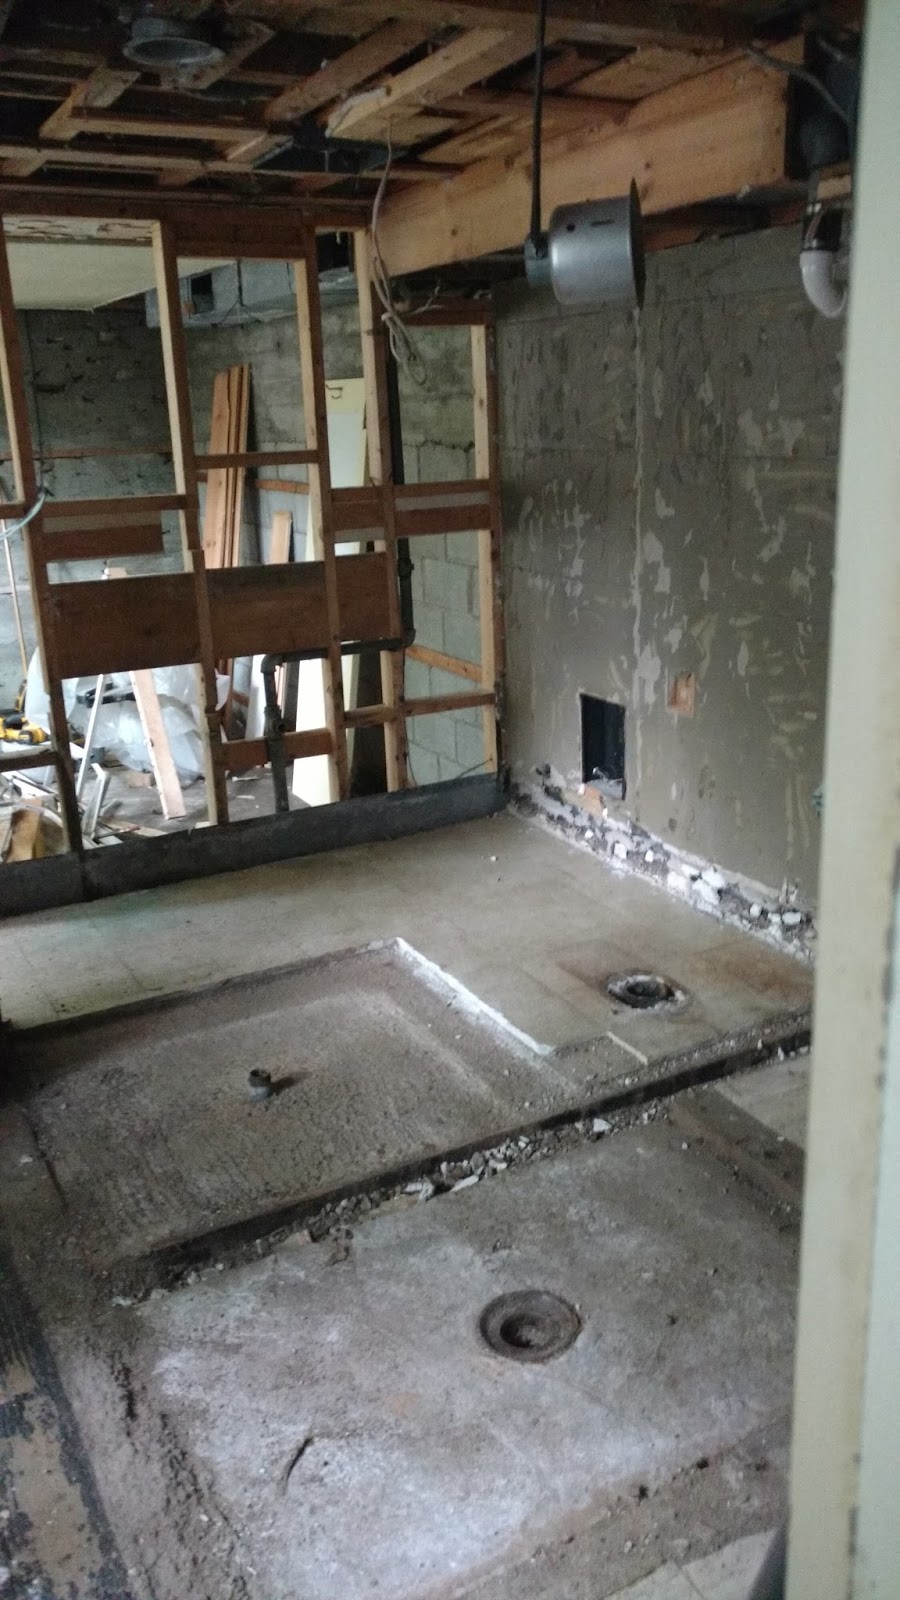
Tearing out the leaky wall - first time I've ever been happy
about a leaking pipe.

The future sitting room - can't you see the potential?

Both showers torn out, one toilet to go


Next, we started to rebuild.  This project was by far the largest we had attempted, and though we used an electrician and plumber, the handy innkeeper did nearly everything else on his own.  Our original plan for the bathroom included a shower and tub, but once we had everything torn out, we realized the existing plumbing would not allow for both.  Until we realized we could put the tub *in* the shower.  Hmmm...

We used distressed wood paneling on the ceilings and poured concrete floors that we acid stained.  Each piece of furniture is hand made, of course, using primarily white and grey and soft green, giving the suite a sort of beachy cottage feel.  

So, after three months of non stop work, we present our newest favorite room, the Chestnut Suite.


Welcome to the Chestnut Suite, featuring a wet bar, mini fridge,
coffee maker, and microwave, as well as dining table for four
daybed, and smart televisions with Roku.

The day bed is the only piece of furniture in the suite that is
not handmade, but we'll forgive the handy innkeeper.

The handy innkeeper insists the day bed is no good for sitting - I agree,
it is perfect for curling up with a good book, or just staring out into the upper
lawn.  Those craving better posture are welcome to the dining table. 

The hallway between the bedroom and the sitting room, with
a long row of windows on the left and the brand new bathroom on the right.
The door to the bathroom is a (what else?) hand made pocket door with a
faux stained glass finish.

This is the original position of the toilet and hand sink in bathroom the first,
but we like our double vessel sinks and wide mirror better.  Of course,
you can no longer contemplate the dark abyss while using the facilities, instead,
you must contemplate this - 

The over sized shower - essentially a wet room that takes up half
the bathroom - with a rain shower head, sliding glass doors,
and our pride and joy and giant pain in the *ahem*, our restored
claw foot tub.  The entire wet room is made of stained cement.


Cozy up to this king sized bed, with a down alternative feather bed
topped mattress and cozy comforter on top.  The master bedroom
also has a (newly) built in closet and sitting area.

The master bedroom has its own little sitting area as well as
its own smart TV, perfect for when families or couples
traveling together need their own space.  The new glass door also
helps to bring lots of light into the bedroom, even with privacy shade down.

Thanks to all of our wonderful guests this year who helped to make the building of the Chestnut Suite a reality.  We are so grateful to all the lovely people we have been privileged to host and can't wait to share this newest addition with you!

Tuesday, September 27, 2016

Progress...Kind of


Distressed wood paneled ceilin

If you have ever undertaken a major renovation project, you know there are stages to the process.  There's excitement at first, as you make plans and blithely set budgets that you will never follow.

Then there is the exhilaration of taking a sledge hammer to whatever horrible feature you have been dying to get rid of.

Of course, once the dust is settled, you get that slight sinking feeling in your stomach as you realize a) someone has got to get all this broken up retro wood paneling and yellow tile cleaned up and hauled away and b) you can't turn back now.

And then, once all that is cleaned up, you realize now you have to rebuild it all.

So we are getting there.  The sitting room is mostly done structurally, except for the floor.  The bathroom is dry walled and painted and waiting for the shower to be poured.  The bedroom is torn apart and cleaned and needs to get drywall.  It feels like nothing has been done (it's still an empty room!), but we are actually moving along, and though we likely won't get the Chestnut Suite open for the peak of leaf season, our family and pet friendly suite will definitely be open for the holidays.

The distressed wood paneling on the ceiling comes down one wall in the sitting area.
The beginning of our wet bar has also been framed out.

The shower, being prepped for cement pouring,
The bedroom, formerly home to three different kinds of wall paneling, now just home to a bunch of studs.

Wednesday, September 7, 2016

Tub Envy


$2200 clawfoot tub from Signature Hardware.  Obviously not the
one that will actually be used in the bathroom because $2200. 
So the biggest part of our newest project is the bathroom.  Once two small bathrooms, each with its own shower, our goal was to create one luxurious master bath.  Visualizing the open space proved a bit difficult as we went through a series of floor plans, trying to take the greatest advantage of the existing plumbing.  Our original plan included a double vanity, oversized shower, and soaking tub.  Once the walls were out, it became clear that we couldn't fit both a tub and a shower.  The handy Innkeeper mourned his clawfoot tub, and then we realized we couldn't fit a tub and shower, but we could tuck a tub into the shower.  

With the room wide open, we decided to turn half of the room into a wet room with a shower head on one side and a tub on the other.  If you've been following along at all, you know we are working on a tight budget and luxury items like $2000 tubs are simply not feasible.  But did that stop us?  Not the handy one, at least.

Step one of refinishing a cast iron tub: gently invert the 250 pound metal tub and remove any hardware.

"Good quality" second hand cast iron clawfoot tub. Uh, this should be fun.
Step two of refinishing a cast iron tub: easily unscrew the feet and set aside

Decapitated feet.  Not shown: the twenty mintues, three dead drill bits, hammer, two screwdrivers, one wrench, and can of WD-40 required to remove said feet.
 Step three of refinishing a cast iron tub: sand away 50-60 years worth of paint.  I probably should have used paint stripper as well - the sander smoothed it out a lot, but you can still see where the layers of paint are, especially at the back where it had heavily chipped.

Sanding the tub.  Lead poisoning?  Don't know what you mean.


Manufacture stamp on the bottom of the tub.  The previous owner told us it was manufactured in the 1940's, but the supposedly the date is usually stamped here and the only numbers are 5,6,7,8, and 10.

Step four of refinishing a cast iron tub: Coat thoroughly in an rusted metal primer, including the feet.  No particular reason why.
I'm not sure if this helps prevent the rust, or just makes it look evenly rusty.

Step five of refinishing a cast iron tub: Spray paint with enamel in your chosen color.

I started out with an aluminum colored spray paint, which made the tub look like it was made out of...aluminum.  One emergency trip to Lowe's later, and the color is darkened to a smoky grey although I did use the lighter silver to add some highlights.

Step six of refinishing a cast iron tub: Paint the feet and reattach - maybe get some non rusted out screws to do it.
Don't tell anyone, but the feet are actually just balancing on the tub in this shot, pending a second emergency trip to Lowe's for some new screws.

Step seven of refinishing a cast iron tub: Gently flip the 250 pound tub back over to reveal the perfectly beautiful insi-gah!  Okay, maybe not perfectly beautiful.

The tub was not actually in terrible condition, but between the rust stains and the enamel starting to wear at the bottom of the tub, we went ahead and re-enameled using the same kit the rest of the bathrooms used.

Step eight of refinishing a cast iron tub: Leave it outside forever because there is no way you are dragging that thing down stairs.  Just kidding.  Kind of.

Purposefully dark shot so the final reveal in the bathroom will be more dramatic.  Or it was 8:30pm and getting dark and we were trying to get it covered before every gnat in the county got stuck to it.  Either one.
. There's more renovation fun to be had.  Keep up with all the latest at Facebook and on our website.

Thursday, August 25, 2016

And so it begins again...

Once upon a time, many years ago (okay, more like two and a half years ago, it just feels like a lifetime), overwhelmed by the sheer number of things that needed to be fixed and updated, we decided to focus on getting the three rooms inside the Inn ready for business before tackling the rooms in the addition.  

Now, just a few months into our opening, we have been so blessed with so many wonderful customers that we often find ourselves uttering those words to potential guests that make us simultaneously overjoyed and so sad - "I'm sorry, we're booked."

So, we turned our attention back to the suite downstairs.  We think that it was likely rented as two separate rooms before - there are two decent sized rooms and two small bathrooms, but the bathrooms are located in a common hall between the two bedrooms making for a less than ideal layout.  The first room is low ceilinged and somewhat dark owing to the fact that it has one small window facing the stone stairway.  Fine for sleeping, but no great views and not a terrible lot of space.  The second room is a little bigger, but was constantly damp - where was the water coming from?  The bathrooms were fairly small and needed the same updating that the others had.  


The blue room with its one small window and walls made out of a couple different kinds of paneling.

Bathroom number one.  Not bad, except that shadowy spot over on the left is literally just an empty alcove.  Good for staring into the abyss while using the toilet.

Bathroom number two, a little smaller, but not much worse than the rest.

The second bedroom, note the multi colored walls and the eternally damp floor.  
We had decided almost immediately to rent the rooms together, using the smaller, darker room as the bedroom, and the larger room as a sitting area.  The suite would be able to sleep up to four guests.  Our original idea had been to update one of the bathrooms the same way we had done the ones upstairs, and then close off the other, with the thought that one day, when we had the time and money, we could convert the two bathrooms into one bigger bathroom.  In the meantime, we could use some paint and new to fixture to, uh, wait, what's going on down there?

We have neither time nor money, yet the shower is being torn out.  Not shown: the sledgehammer the handy Innkeeper used to tear it down by hand.
More tearing out of walls.  On the plus side, we found the source of the water - a leaky pipe.  I'm sorry, did I say "a leak pipe"?  I meant, all the leaky pipes.  As in every pipe down there was dripping in some way, shape or form.  All the paneling in both rooms will be removed due to water damage.


Breaking down walls between the bathrooms.

The toilet here will be replaced and a double vanity put in beside it.


Completely demolished - both bathrooms are stripped down to studs and cement.

So what's next?  Well, honestly we have only the vaguest idea.  We do know that this will be involved, though:


Keep following along on Facebook and at redleafriverinn.com!


Wednesday, June 8, 2016

Carmelized Onion Strata

 Carmelized Onion Strata
yield: 4 servings

1 small yellow onion, thinly sliced
1T olive oil
1/2 red bell pepper, diced
6 slices stale bread
3oz smoked gouda, shredded
6 ea eggs
12oz half and half or whole milk
pinch cayenne
salt and pepper to taste
Chopped tomatoes and Italian parsley

1. Preheat oven to 350 deg F
2.Cook the sliced onions in the olive oil over low heat until soft and brown.
3. Add the bell peppers and saute another 1-2 minutes, or until the peppers just begin to soften. Season with salt and pepper and remove from heat.
4. Butter a nine inch pie plate and layer bread in the dish, covering the bottom and sides of the dish.
5. Top with the onion and pepper mix and the shredded smoked gouda.
6. Whisk eggs and half and half together with the cayenne, salt and pepper.  Pour over the bread.  Allow to sit at least fifteen minutes to soak or wrap and place in the refrigerator overnight.
7. Bake the strata for 10-15 minutes, or until completely set and lightly browned.  Allow to cool for five minutes before cutting,  Garnish with tomatoes and parsley.

Alternate directions:

1. Book a room at the Red Leaf River Inn
2. Have a cup of coffee and fresh baked pastries while a chef prepares your breakfast.
3. Enjoy your delicious meal.


Tuesday, May 31, 2016

Welcome to the Red Leaf River Inn


In October of 2013, we stood starry eyed under falling red leaves and saw the gorgeous potential of an abandoned estate.  In December of that year, after so many obstacles that we began to wonder if someone was trying to tell us something, we finalized the purchase of our Inn.

In January of 2014, we stood in the cold under barren trees and leaking water pipes and wondered what we had gotten ourselves into.  Still, we were determined to breathe life back into the ivy choked house.  We gave ourselves just over a year to make the changes.  

Every project we started seemed to have a never ending list of complications added to it and there were many times when it seemed easier to give up, but we knew that a property as special as this deserves to be cared for and shared.  So, we built something else, painted and sanded and stained and fixed and fixed again.

Now, two and a half years later, we are finally able to officially invite you to come and stay.  Hear the cool mountain breezes through the trees and the gentle sound of the stream.  Relax in our newly renovated rooms.  Enjoy great food and company.  

We invite you inn.  Welcome to the Red Leaf River Inn.